29 Rays: loops meet the mouse
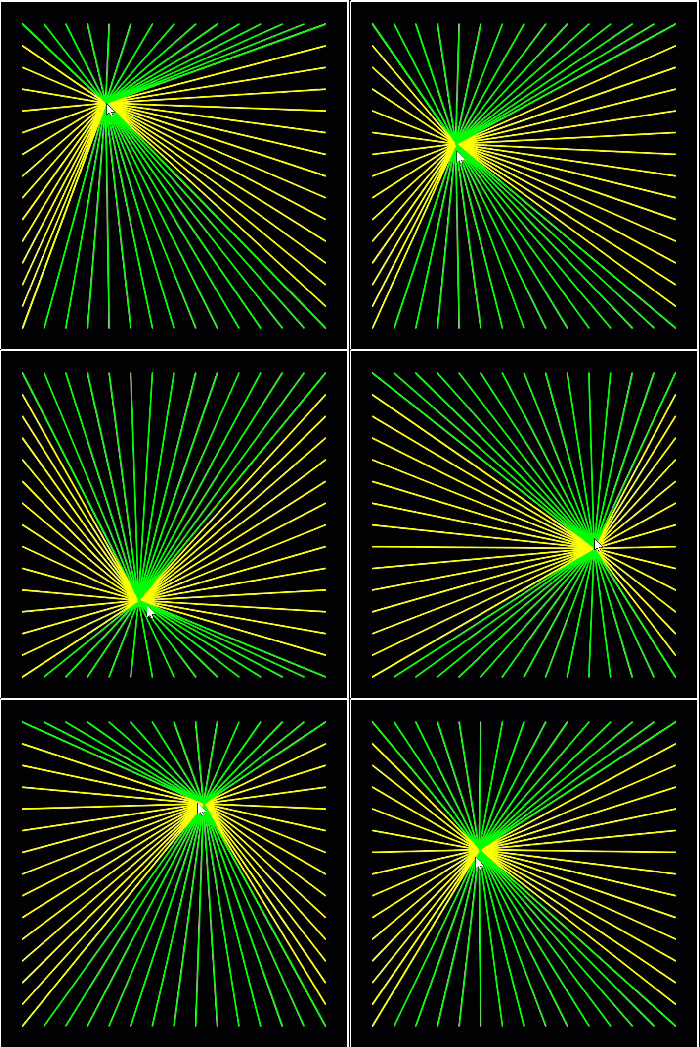
The grid from the last chapter is calm. Two loops run once inside setup, the picture is done, nothing moves. This chapter wakes the loops up. You put a while loop inside an event function, and suddenly 60 lines redraw themselves every time the mouse moves, like threads pinned to the edges of the canvas. Then you go one step further and give the rays a color that never stands still, cycling through the color wheel like the lighting of a gaming keyboard. The loop itself stays exactly the one you know: four steps, nothing more. What changes is where it lives and what happens around it.
29.1 AI tutor
Two ideas meet in this chapter: a loop and an event. If your rays don’t show up, smear across the canvas, or wear the wrong colors, tell the tutor which of the chapter’s two exercises you are in and show it your loop.
Hints and questions instead of finished programs, in English or German.
29.2 A loop inside an event
So far, loops ran once, in setup. But a loop is a statement like any other: it may live in any function. When a loop lives in mouseMoved (Section 11.4), it runs again on every mouse move, drawing its whole picture fresh each time. That is exactly how the rays work. Here is the plan of such a program, with the loop itself still missing:
function mouseMoved() {
    background("black");
    strokeWeight(2);

    // the loop draws all rays for the current mouse position
}
The first statement repaints the background. You know that move from the bouncing ball (Section 23.2): repaint first, then draw. Without it, every mouse position would leave its rays on the canvas, and after a second of movement the picture would be a smeared tangle of old lines.
29.3 One variable, four lines
Where do the rays start? Look at the goal picture. The starting points sit evenly spaced along all four edges, one grid step apart, with a margin of 25 pixels. Those are the same positions your grid loop visited. The new idea is that in each round, the loop variable i marks four points at once, one per edge:
(MARGIN, i)on the left edge, and(width - MARGIN, i)on the right edge:iis the height of the point.(i, MARGIN)on the top edge, and(i, height - MARGIN)on the bottom edge:iis the horizontal position of the point.
Every ray ends at the same point: (mouseX, mouseY). So one round of the loop draws four lines, and the body sets two colors while it works, yellow before the left-and-right pair and lime before the top-and-bottom pair. In the grid, the color was set once before the loop, because every line looked the same. Here two colors take turns inside every round, so the stroke calls move into the body.
One more difference from the grid loop is easy to miss: the condition. The grid stopped with i < SIZE, keeping the last line off the border. The rays want anchor points on the last position, SIZE - MARGIN, so the loop runs while i <= SIZE - MARGIN. Whether < or <= is right is not a grammar question; it is a design decision, and your loop table shows you which one you need. Write down the last value you want, and check which comparison still lets it through.
29.4 Your exercise: Rays
- Make a loop table for
SIZE = 100andMARGIN = 25, with the conditioni <= SIZE - MARGIN. Which values doesitake, and how many rounds is that? Does the last anchor position,SIZE - MARGIN, get through? - Read the starter code. It is the plan from the beginning of the chapter (Section 29.2), ready to go: the constants
SIZEandMARGINare declared, andmouseMovedalready repaints the background and sets the stroke weight. A comment marks the spot where your loop belongs. - Start with one edge. Set
stroke("yellow")before the loop for now, and write the loop with a single statement:line(MARGIN, i, mouseX, mouseY);. Run it and move the mouse. One fan of yellow rays from the left edge, nothing else. - Add the other three edges, one
linestatement per edge, and move the colors into the loop body: yellow before the left-and-right pair, lime before the top-and-bottom pair. - Change the constants.
MARGIN = 50, thenSIZE = 300. The fans must follow by themselves.
29.5 A color that never stands still
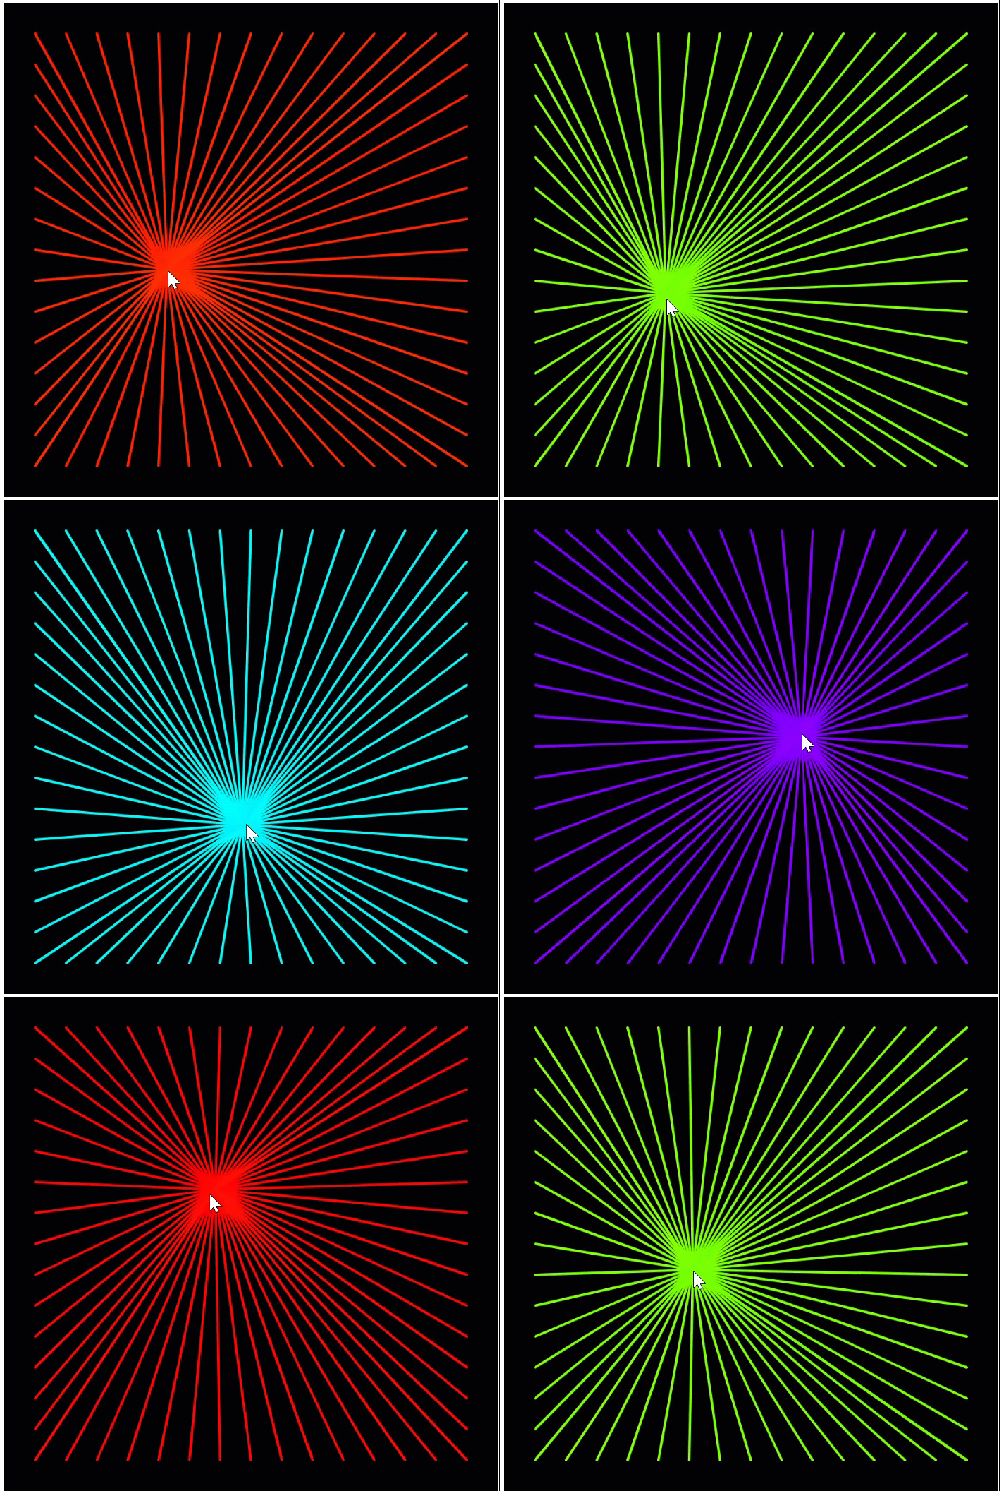
For the second exercise, the rays should change color continuously, like RGB lighting. That needs two changes in how the program is built, and both reach back to earlier chapters.
First, the loop moves from mouseMoved into draw (Section 23.2). mouseMoved runs only when the mouse moves, so a color animation would freeze the moment you let go of the mouse. draw runs about 60 times per second, no matter what, and the starter code of the exercise has this change already made. The rays still follow mouseX and mouseY; those variables are always up to date, in any function.
Second, the color needs a memory. A color that changes is a value that must survive from one frame to the next, and you know the tool for that: a global variable (Section 15.4), declared outside every function.
// The current hue value of the rays
let rayColor: number = 0;
The color itself is a hue on the HSB color wheel (Section 14.4), so setup gets a colorMode(HSB); and the loop paints with stroke(rayColor, 100, 100);, full saturation, full brightness. And after every ray, the hue takes a tiny step:
rayColor = (rayColor + 0.25) % 360;Read the right side inside out: take the current hue, add a quarter step, and then % 360. The modulo operator is an old friend from digit extraction (Section 15.5), and here it does its second job, wrapping. As long as the sum stays below 360, % 360 changes nothing. The moment it reaches 360, the remainder snaps back to 0, which is exactly right, because 360 and 0 are the same point on the color wheel. A variable that grows step by step like this, keeping its value between rounds and between frames, is called a running value, and you will meet it in many programs, counting points, summing prices, or turning a color wheel.
The update line sits inside the loop, so the hue moves a quarter step from one ray to the next. Within a single frame, neighboring rays differ slightly in color, which gives the fan its soft gradient. If the update ran after the loop instead, every ray in one frame would get the same color, and the fan would change color as a whole, one hue per frame. Both are valid designs. The exercise builds the first one, and trying the second for a moment is a great experiment.
29.6 Your exercise, part 2: Colored Rays
The starter code is a finished rays program, already living in draw. The exercise text walks you through every snippet; your job is to place them correctly and understand what each one does.
- Read the starter code. Find the one difference to your own rays solution: the function is called
drawnow, notmouseMoved. - Set the color mode. Add
colorMode(HSB);tosetup. - Add the global variable. Declare
rayColoroutside every function, and give it its data type: the exercise showslet rayColor = 0;, and in this course every declaration carries its type, so writelet rayColor: number = 0;. - Recolor the loop. Remove the two old
strokecalls and putstroke(rayColor, 100, 100);at the top of the loop body. - Add the update
rayColor = (rayColor + 0.25) % 360;at the end of the loop body, and run. The fan should slowly turn through the color wheel. - Experiment. Change
0.25to5: faster cycling, stronger gradient. Then move the update after the loop for a moment and watch the gradient disappear. Put it back where the exercise wants it.
29.7 Check your understanding
When your rays follow the mouse in ever-changing colors, take the short quiz below. You answer six questions about this chapter in your own words, and an AI reads your answers and tells you what you already understand and what you should read again. The quiz is anonymous, and answering in German is fine too.